Friday 19 December 2008

Mixiote

Mixiote is a recipe originating from pre-Colombian Mexico. Meat, usually mutton or rabbit, is seasoned with chile & wrapped in the tough outer skin of leaves from the Maguey tree, then buried in a pit with hot coals for several hours to cook. Mixiote is also the name for the Maguey leaf skins.

Since the Maguey* (Agave americana, also known as the Century plant, although it's life span is more along the lines of 25 years. The immature flowering stem is harvested to make pulque, an alcoholic beverage) isn't a common plant here in the north of England, and it takes around 11 years for each leaf to grow (being 2 meters long & covered in spines probably makes it quite a faff to harvest too), baking parchment works well as a substitute.

Living under the yoke of Yorkshires Clean Air law, a big fire pit in the garden is probably not going to happen either, so we'll be steaming the mixiote.
Also, me being a vegetarian, this recipe will be made with Quorn.

Quorn is one of the greatest things to happen to the lacto-ovo vegetarian (or Vegetarians who eat dairy products and eggs, as we're otherwise known), it's a mycoprotein food (a fancy term meaning it's a mould grown in fermentation tanks - tasty!) high in vegetable protein & dietary fibre, while also being low in saturated fat & salt. It's also delicious. And versatile. Yay, Quorn!

Okay, enough flag waving. This recipe also works with tofu or seitan too. Or if you're in the mood for some veg, butternut squash should work well instead.

Quorn Mixiotes

1 350g pack of quorn pieces (you could use the same amount of firm tofu, mild flavoured gluten. Heh, you could even use chicken or mutton, cut into 1" cubes)
1 Ancho chile
1 Guajillo chile
1 Pasilla chile
1/2 onion, chopped
50g ground almonds
1 sun dried tomato (or 1 fresh tomato, or 1tbs tomato puree)
2 cloves garlic, crushed
200ml Vegetable stock (although orange juice also works well)
1 tbs oil
1/4 tsp each of thyme, cumin & oregano
Salt & pepper
4 Bay leaves
4 cloves

Deseed & toast the chiles in a dry frying pan. Place in a bowl & cover with boiling water & leave to soak until soft. Drain & put into a blender or food processor with the tomato, garlic, vegetable stock & onion & blend until smooth (add a little more water if necessary). Heat oil in a saucepan until quite hot, but not smoking. Add the chile mixture & stir. It will hiss madly at you, but fear not, this will thicken up & enrich the sauce, and make it even more delicious. Reduce the heat & add the ground almonds, cumin, oregano & thyme. Leave to simmer on a low heat for around 10 minutes. Add salt & pepper to taste & put to one side.

Combine the quorn/tofu/whatever with the chile mixture. If you're using tofu or meat, leave to marinade for at least 1 hour. If the mixture is a little dry, add a little water or stock.
Cut 4 24cm squares of baking parchment or greaseproof paper & divide the mixture equally between them. Add a bay leaf & a clove to each pile & tie up into parcels (I'm using red string from brewery malt sacks, though those of you not married to brewers can use butchers string, garden twine or anything along those lines). Arrange in a steamer & steam until cooked through (for quorn or tofu this will be around 45 minutes to 1 hour). Serve the parcels with warm corn tortillas & sliced avocado.

Om Nom Nom!

*In Aztec mythology, the Maguey was created by Quetzalcoatl**, the Feathered Serpent, out of the bones of Mayahuel after she was devoured by star demons. And no, I'm not making it up.

**And also terrorised New York city in Q - The Winged Serpent

Saturday 13 December 2008

Mincemeat - It's not minced, and it has no meat in it!

Mince Pies are a traditional food eaten in the UK at Christmas. They first appeared around the 11th Century and were originally oblong casings filled with minced meat & 3 spices; cinnamon, nutmeg & cloves (representing the gifts brought by the 3 wise men in the Nativity story). It was considered good luck to eat mince pies on each of the 12 days of Christmas.

In the 15th Century mince pies still contained meat, but also had dried fruit & vinegar or wine in them, and were savoury, spiced meat pies, rather than sweet treats. By the 18th Century brandy & sugar were combined with minced meat, dried fruits & candied peel to make something more like the mince pies we know today. Over time, omitting the meat (but replacing it with shredded beef suet) became the common practice.

Here in the UK, you can buy mince pies, or jars of ready made mincemeat, from October or November to December. But where's the fun in that, eh? Making your own mincemeat is easy, and doesn't take much time, and the results are much tastier than anything you can buy in the shops. It's also easy to substitute ingredients that you're not too fond of. Think currants are horrible dead flies, not fit to grace a pudding? Don't put them in, then. Put some chopped apricots in instead. Or whatever dried fruit floats your boat. Don't want suet? Don't put it in then. Grate 4 or 5 apples or pears into the mixture instead. Fancy something a bit tropical? Replace the almonds with slivers of coconut & the currants & raisins with dried mango & pineapple, a splash of white rum and you've got yourself something special there.

This year my mincemeat recipe is inspired by a batch of cranberry-almond cookies. Mmmmm.

Cranberry Almond Mincemeat (makes about 1.5kg/3lb. That's a lot of mince pies)

150g/6oz/1 cup vegetarian shredded suet*
225g/8oz/1 1/2 cups currants
150g/6oz/1 cup dried cranberries (preferably unsweetened)
115g/4oz/3/4 cup dates, destoned & chopped
150g/6oz/1 cup raisins
225g/8oz/1 1/4 cup sultanas
115g/4oz/1 cup flaked almonds
1 apple, grated
90ml/6 tbsp clear honey
60ml/4 tbs dark rum
1 tsp ground mixed spice
1/2 tsp ground cinnamon
Juice & zest of 1 orange

Combine all ingredients in a large mixing bowl. I roughly chop the dried fruit beforehand. I like the texture you get with it. You don't have to do it yourself though. An old English tradition is to only stir the mincemeat clockwise. Stirring anticlockwise will bring bad luck in the coming year. So stir it clockwise. Cover & store in a cool place for 2 days, occasionally giving it a stir & getting giddy on the rum fumes. Spoon into sterilised jars & seal. Store until needed.

*Yes, I know suet is Bad and Will Kill You. But this is a recipe I make once a year, so use the Special Occasion Defense. It gives the mincemeat a richer flavour & keeps everything moist. You can substitute it with 4 or 5 large apples (or pears) grated into the mix & a cup full of cider, apple juice or orange juice.

Piccalilli

Piccalilli is a variety of pickle or relish that first appeared in the UK around the middle of the 18th Century, often going by the name of Piccalillo or Indian Pickle. It is a tangy, chunky pickle, made bright yellow with the addition of mustard & turmeric, and is an excellent accompaniment to bread & cheese, sandwiches & cold meats.
And it's very easy to make.

Since MikeyFox was stuck at home with a bad back, it seemed like a good time to introduce him to the noble art of preserving, so we made Piccalilli.


Piccalilli takes a bit of time & planning, and you'll need to get started the night before. You will need...

1 small cauliflower, broken into small florets (not too small, it's a chunky pickle after all)
1 courgette, split in half lengthways & chopped (any curcubit will do, though. Half a cucumber, deseeded & chopped is good. Or marrow, again deseeded & chopped*.)
2 carrots, peeled & chopped
2 onions, finely chopped
50g fine sea salt

Place all your chopped veggies in a colander or a large bowl & cover with the salt. Give everything a stir, cover & leave in a cool place overnight (or 24 hours if possible). The salt will draw out moisture from the veggies (so if you are using a colander, place it in a bowl), so when they are cooked, they will remain firm & crunchy. Yum.


The next day, marvel at how much water has come out of the veg. Then discard. Sorry, salty veggie water. Give your veggies a quick rinse with cold water & pat dry.
If you don't have a big preserving pan, any large stainless steel pan will work fine. Into the pan goes
500ml cider vinegar or white wine vinegar
250g sugar
2 tsp yellow mustard powder
1 tsp turmeric (to make it Yellow!)
1/2 tsp each of ground ginger, cumin seeds, yellow mustard seeds, chilli flakes & grated nutmeg.
Stir over a low heat until the sugar dissolves. Increase the heat & bring to the boil. Add the vegetables, and some fresh ground pepper (as much or as little as you want). Bring to the boil & then reduce the heat & simmer, uncovered, for 10 minutes.
While the Piccalilli is simmering, you'll need to do one more thing. You'll need
2 tbs cornflour
Place in a small bowl & add a little of the cooking liquid from the pan & stir until you have a smooth paste. This is to thicken up the piccalilli liquid. So at the end of the 10 minutes of simmering, remove the pan from the heat & add the cornflour paste. Stir & return to the heat, bring it to the boil & simmer for 5 minutes. The liquid will thicken up & coat the still-crunchy vegetables.
Spoon into warm, sterilised jars & seal. If you can bear to leave it be for a month, all the flavours will mellow & mature, and it will be delicious. If you can't, that's okay too. It will still be delicious.
Om Nom Nom!

*It's nothing personal, seedy bits. You're just soggy and tasteless is all.

Monday 24 November 2008

A Hat So Easy It Should Be Called Your Momma

Every year I say to myself 'This is the year I will make gifts for people, for handmade gifts are the bestest'. Unfortunately I say this every year around mid-December, when I have neither time nor money to spend on such endeavour, and anyway entering any retail outlet in December involves donning thick armor plating, a crash helmet & kneepads (what? You seriously think you can walk to the cashiers? Crawling on your hands & knees, clutching your purchases to your chest & praying to Cthulhu is the only way you're getting out of there*).
Well, for some reason (the planets were in alignment? A white buffalo was born? Pushing Daisies. Oh, yeah. That was it), this year the thought occurred a month earlier.
Huzzah. Thank you, Emerson Cod.
So this Christmas, every one's getting a scarf. Or a hat. Or fingerless gloves if I can fathom how to do them (don't hold your breath, Mike!)

Here's how to make a really easy roll-brim hat. Not only is it easy, it's also fast (insert appropriate 'Your Momma' joke here), and only takes an evening to make (this particular hat took me a Sunday double bill of Columbo). It also has the magic power of fitting comfortably on different sized heads, from my own 21" scalp to Mikeyfox's Mekonesque 24" cranium. Fancy that.

You will be needing a 41cm/16" 8mm circular needle (the 8mm is the needle thickness, the 41cm/16" is the length of the circular needle). Don't be afraid of the circular needle, it's more scared of you than you are of it.

You'll also need 4 dpns (double pointed needles). Yes, they are scary looking, and if you don't keep an eye on them they'll slip down the back of the sofa & perform acupuncture on you when you're watching Gilmore Girls.

You'll need a ball of wool too, the chunkier the better. A single 100g ball should do the job (though you won't have anything left over. If you're worried, get more, it'll get used for something eventually). I used King Cole Homespun super chunky yarn in green, which is a nice thick wool/acrylic mix. You could use any chunky wool suitable for an 8mm needle, Sirdar Super Nova Tweed wool works really well too. (If you're really worried about the finished hat size, then knit yourself a gauge & work out the stitches per inch)


Cast 60 stitches onto your circular needles. Yes, it looks far too small right now, but have I ever steered you wrong before? Now comes the fun part, 'knitting in the round'. Yup, you're going to be going around in circles. Before that, straighten out all your stitches & make sure that they are all pointing inwards (or down, if that's your thing). You don't want to get your stitches twisted up, or you'll end up knitting a Mobius strip. A surface with only one side it may be, a hat it isn't. You'll need a stitch marker (you can buy stitch markers, and they come in different colours & styles. For this I'm using an Ankh ring sent to me by the lovely Cynthia as my stitch marker. Just slip it onto the needle next to the last cast on stitch. The stitch marker is just there to show you where the end of the row is. When you knit your row & get to it, you just slip it from one needle to the other & carry on knitting. It doesn't get knitted into the hat, just goes round & round the needles.
Hold the needle with the last cast on stitch in your right hand & the needle with the first cast on stitch in your left hand and knit into that first cast on stitch, pulling the yarn firmly to prevent getting a gap in the join between the two stitches (though this being a roll brim hat, no one will actually notice if the joint is a bit shoddy).
Sensible folk will recommend that you knit with the needles facing towards you, rather than away from you (like in regular knitting). I can't wrap my head around such things, so knit with needles towards me, which has the bizarre effect of turning the hat inside out. But that's fine, just turn it right way round when you're finished. Work whatever method suits you best.


Another magic power of the circular needle is it turns a Garter stitch into a Stockinette. Yes, hot snow falls upwards. Why does it do this? Because you're knitting in a spiral, rather than the back & forth of regular needles. So if you want to make a garter stitch hat, you'll need to knit 1 round, purl 1 round & keep repeating. Or you can knit an inside-out, garter-that-becomes-stockinette magic-hat instead.
Keep knitting until you have 6" or 7" or so of knitting (a little less if you're making a Beanie style hat, a little more if you want a big chunky brim). Now comes the decreasing. Just relax. get yourself a cup of tea. Or a glass of wine. Some Malbec would go down well. Knit 8 stitches, then knit 2 stitches together. Repeat until the end of the row. Now knit 7 stitches, and knit 2 together, and repeat until the end of the row. Now knit 7 stitches, and knit 2 together, repeat to the end of the row. At this point you & the circular needles will have to part ways. yes, it's been a whirlwind romance, but you'll meet again soon. Time to meet the dpns, the double pointed needles -discovered by a the Mad Arab Abdul Alhazred in the ruins of Babylon & used to knit a cabled tote bag for his early draft of the Necronomicon. Wield them and despair!


Okay, so they're not that bad. But look, they make an Anarchy symbol when used to knit a hat. Coincidence? Probably, yeah.
Moving on...
You can just slip your stitches onto 3 of the dpns, spread them out equally & continue knitting the rounds of decreases. Or you can knit straight onto them, whatever works best for you. With the 4th needle knit off the dpns (it sounds complicated, but it isn't. Just take your empty needle in your right hand & the dpn with the stitches you need to decrease next in your left. Knit & decrease from left to right, and use the now empty left hand dpn to do the same again to the next one). Knit & decrease for as long as you can stand to (I keep going until I have 3 or 4 stitches, but I'm Peculiar), cut your yarn, leaving a tail of several inches, and thread through the remaining stitches. Tie off & weave in any loose yarn left (don't forget the bit at the brim where you cast on). Turn it right way around (if you've been knitting it inside out)


There you have it. A very fine hat.

*Oh, mighty cephalopod, get your lazy arse out of bed and smite mine enemies with your flailing tentacles, so that your humble servant may purchase gaudy, overpriced tat...

Wednesday 12 November 2008

Chutney

Back when I was a cub, every summer my Mum & I would go out to our local pick-your-own farm, with it's endless fields of strawberries & raspberries (and the occasional row of mysterious hybrid something-berry*), and pick our own body weights in soft fruits, which would be taken home and turned into jam. Jam, jam, bloody jam. No eating strawberries raw for us, it had to be boiled up with preserving sugar & poured into jars. Or doused in sugar & left in the fridge overnight to go soft & pulpy. Brrr.
So when I eventually inherited my Nans giant preserving pan (where many a succulent red fruit met its grisly end), I vowed never to make a single blob of jam in it. No, it was to be reclaimed, redeemed & turned to a higher purpose.

Yes, dear reader, it would be used to make chutney.

Ahh, chutney. Friend of cheese, saviour of the boring sandwich, secret ingredient of shepherds pie or pumpkin tagine. And the nicest thing to do with cheese on toast (though spreading the toast with marmite before adding the cheese is also very tasty).
As I've mentioned before, few things make me happier than spending an afternoon pottering about in the kitchen making something tasty. And I had all these Pumpkins...**


So better make some Pumpkin Chutney then!

700g pumpkin (any variety will do, really), peeled, deseeded & chopped into equal sized pieces.
700g apples, peeled, cored & chopped into equal sized pieces (I used half cooking apples from my father-in-laws impossibly high-yielding little tree, and half coxes, as all my apples had gone to the Great Cider Making Caper)
1 large onion, peeled & diced
250g demerera sugar (or any brown sugar)
450ml white wine vinegar (or cider vinegar, or even malt vinegar, though that would be like taking the delicate flavour of your pumpkin, wrapping it around a housebrick & smacking yourself in the face with it (which is entirely understandable sometimes)
250g raisins
1tsp salt
1tbs chilli flakes
1" ginger, peeled & chopped

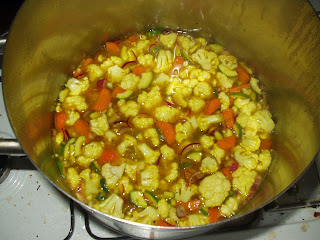
Pile all of that into your preserving pan. I know it doesn't look like there's enough vinegar in there, but there is. Promise.
In a piece of muslin (though I used a reusable teabag here. A crazy little invention from Whittards) tie up 1tsp peppercorns, 1 cinnamon stick (you can break it up if you need to) & 6 or 7 cloves. Chuck into the preserving pan & bring everything slowly to the boil. This will occupy you for the next hour or two, so I recommend a Micah P. Hinson CD while you work. Broken Family Band will also work, chutney likes being sung to.
Stir occasionally, and when it reaches a boil reduce to a simmer & give it the odd stir to make sure nothing sticks to the bottom or burns (unlikely to happen at the start, but after an hour it'll get thick & tricksy). After about an hour & a half (maybe more, maybe less) it will have thickened up, and you can draw your spoon across the bottom and see the base of the pan briefly, like Moses parting the Red Sea. Only it's a chutney sea.


You have Chutney! Spoon into clean, sterilised jars & seal. Waste half an hour on Google images looking for a good picture to go on the label, then store in a cool, dark place for a couple of months to mature (though you'll probably have a jar that's only half full. That can be used straight away. Future jars will be better & more matured, but it will still be tasty.
Om Nom Nom!

*Where I was disheartened to discover that the Loganberry didn't give you X-Men powers, and was just a fancy word for 'bigger Raspberry'. Hmpf.

**Some people smoke. Some people run up huge credit card debts buying shoes. I buy pumpkins. Could be worse.

Thursday 6 November 2008

Dangerous Vegan Cutlets

It's cold, damp & the streets are lined with spent fireworks (I'd collect them for kindling, but I'm pretty sure that would result in one brief, spectacular bonfire, and a mention in the last 5 minutes on the 6 o'clock news*), so comfort food seems in order.

So here's a recipe for Dangerous Vegan Cutlets**
Long ago, this was a recipe for Chickpea Cutlets from that glorious tome, The Veganomicon (Klaatu barata nikto!), great recipes & a sense of humour all in one cookbook? Huzzah!
Though time, laziness, absent-mindedness & a distressing tendency towards experimentation have created this recipe, which still resembles the original.
For this recipe, we'll be needing some gluten powder (or wheat gluten, which I've mentioned before in the seitan recipe)

Dangerous Vegan Cutlets

1 can cooked chickpeas
1/2 cup gluten powder
1/2 cup breadcrumbs (preferably cornbread-crumbs, though anything else will do)
3 cloves garlic, grated
1 tsp salt
Black pepper. A lot
1 tsp paprika (preferably smoked)
1/2 tsp cumin
1tbs Tabasco or chipotle sauce (I like Valentina Salsa Muy Picante, but any favourite hot sauce will work)
1/4 cup vegetable stock

In a bowl, mash the chickpeas. They don't have to be a hummus-style puree, just knocked about a bit so there are no whole ones left. Add the garlic, breadcrumbs, stock, spices & seasonings & stir.

Scatter the gluten powder over the chickpea mixture & stir. Terrible things will occur. Don't worry, that's the miracle of gluten powder.

Knead the sticky mass until elasticy strings have formed. It'll only take 2 or 3 minutes. Cut into 4 equal pieces & flatten into cutlets (or burgers, they're pretty good in a bun with some spinach or shredded lettuce, topped with a few jalapeno slices. Num!) about 1cm thick (though a little thicker or thinner is fine). I tend to make mine thinner at one end. Why? No idea!
Pour a thin layer of oil into a large frying pan over a medium heat & fry the cutlets for 5-7 minutes on each side (you can add more oil if necessary when turning them). They're ready when browned & firm to the touch.

Mmmm. You can serve them with roasted or steamed veg, vegetable rice, or in a sandwich with some salad & avocado, smothered in gravy or salsa. You can even slice them & fry until crisp, and scatter over salad or fajitas (on corn fajitas is especially nice). These ones were eaten with mustard mash with some illicit french beans***

This is a great recipe to do some experimenting with. No chickpeas? try Pinto beans, or red kidney beans (they work really well). Butter beans with lots of garlic & herbs make a great cutlet. Or chickpeas with some Madras (or whatever Indian spice paste or powder you have lurking at the back of your cupboard) paste instead of the paprika & tabasco. Borlotti beans with grated onion & garlic & a dollop of sundried tomato paste works well too.

Om Nom Nom!

*if I'm lucky. It'll probably be a sideline in the Sheffield Star. BBQ Vegetarian a hit with local cats.
**After Nighthawks at the diner's Dangerous Veal Cutlets at the Copper Penny.
My veal cutlet come down, tried to beat the shit out of my cup of coffee. Coffee just wasn't strong enough to defend itself...
***Thanks to my Mum, master of the illicit vegetable.

Wednesday 5 November 2008

Vegetarian Pozole Rojo

Pozole is a Mexican stew traditionally made with pork and nixtamal (also known as hominy, a large variety of dried corn kernels treated with lime* to increase its nutritional value & make it more easily digested). Hominy is a bit tricky to get hold of in the UK (Coolchile sell the dried variety, which is what I'm using in this recipe). This is a vegetarian version of the classic red pozole, using pinto beans instead of pork.
This isn't a quick recipe. This is an extremely slow recipe. I'll no doubt blather about slow cooking another time.

Vegetarian Pozole Rojo (Vegetarian Red Pozole Stew)

2 cups dried hominy
2 cups Pinto beans (dried & checked over)


Here's the dried hominy & pinto beans in a bowl. Rinse & cover with cold water, and leave to soak overnight (see, told you it was slow!), or for 6 hours.

Next morning (or 6 hours later), drain the beans & hominy & rinse.


Here's a closer look at the hominy after its soaking. The kernels have doubled in size, and are starting to look a bit more tender and appetising. They also have a very distinctive smell. Put in a large pot & cover with water. Bring to the boil & then simmer until the beans have become very soft & the hominy has swollen & started to burst open. This can take anything from an hour to 3 hours, maybe even 4, depending on how fresh the hominy & beans were.
While the hominy is simmering, you'll need to make the chile sauce (yes, more work. But this will add lots of flavour, and make the pozole red. Instead of swampy grey. No picture of that here, is there?!)

Chile Sauce
3 Ancho Chiles, deseeded & chopped
3 Guadjillo Chiles, deseeded & chopped
6 cloves garlic, chopped
1/2 onion, chopped
1tbs oil
2 cups chopped tomatoes or passata

Heat the oil in a pan & fry the onion, garlic & chiles until softened. Add 2 cups of the cooking water from the pozole & leave to simmer for 5 to 10 minutes. Remove from heat & pour into a blender or food processor & blitz until you have a smooth sauce. 1/2 an hour before the end of cooking, add this chile sauce & the chopped tomatoes or passata to the pozole & stir in.
Suddenly your distressingly grey stew is RED! Huzzah, for soon you will eat!
While the pozole has its last half hour of simmering, you'll need to prepare some garnishes.

Yes, garnishes. Half the glory that is pozole is the variety of garnishes you can scatter over your bowlful of stew (kind of like the Chinese Hotpot or Steamboat/Steambowl, where the stock is served with a wide variety of ingredients & condiments, so each serving is different). Shredded lettuce, spring onions, chopped red onion, lime wedges, avocado slices, tortilla strips, sliced radish, sour cream & coriander all make great toppings (radish is surprisingly nice. Avocado & lime is even better)


Om Nom Nom

*Not the citrus kind of lime, the other stuff. The earliest known use of this process is in Guatemala around 1200BC. Cherokee Indians used this method to make a fermented stew called *deep breath* Gv-No-He-Nv A-Ma-Gi-i.

Sunday 2 November 2008

On This Day

On November 3rd, 1927, a Prussian ministerial decree was issued requiring all Roma to be registered through documentation "in the same manner as individuals being sought by means of wanted posters, witnesses, photographs and fingerprints."
Infants were to be fingerprinted, and those over the age of six to carry identity cards bearing their photograph as well. Between November 23rd and 26th, armed raids were carried out by the police on Roma communities throughout Prussia to enforce the decree of November 3rd. Eight thousand were processed as a result.

History? No, it's happening in Italy right now. Italy's interior minister Roberto Maroni has proposed and begun implementing a policy of police fingerprinting of all members of the Italian Roma/Gypsy Community. That alone is a cause for concern, but when combined with the repeated (and unpunished) attacks on Gypsy camps, and the Italy's Highest appeals court ruling that it is acceptable to discriminate against Roma because "All Gypsies were thieves".
Déjà vu?

We are not monsters, we are not thieves. We are just people.

Thursday 30 October 2008

Leftover Mash (Again)

Here's another thing that can be done with leftover mash - cheese & potato scones. They're a bit different from regular scones, lighter in texture, and you might be less inclined to smother them with jam (try chutney instead)
Cheese & Potato Scones

115g/1 cup plain flour
½ tsp salt
4 tsp baking powder
40g/3tbsp butter
1 egg, beaten
50 ml/1/4 cup buttermilk or semi-skimmed milk
115g/1 1/3 cup mashed potato
50g mature cheddar, grated
2 tbsp chopped sage or chives

Preheat oven to 220C/425F/G7.
Sift flour, salt & baking powder into a bowl. Rub in the butter using your fingers (agh! Stupid fingers. Stupid cold house. Stupid unmeltable butter) until it resembles fine breadcrumbs. Mix in the egg & milk. Add the mashed potato, herb & half the cheddar & mix into a soft dough (you might need to add a little more flour). Turn out onto a floured area & knead until you get something more like dough & less like madly made cement. Roll out the dough 2cm/3/4” thick & stamp out scones using something that resembles a 6cm/2” cutter (half pint glass, baked bean tin with both ends cut off & cleaned out inside, pumpkin shaped cookie cutter & cutting freehand all work okay). Place scones on a baking sheet that has been greased/lined with baking parchment or scattered with flour & brush the tops with egg wash or milk. Sprinkle the remaining cheese over each scone & bake for 15 minutes (maybe a little longer if necessary) until golden on the top. Leave to cool on a wire rack. Eat.


Om nom nom.

Tuesday 28 October 2008

Guajillo Chile

Guajillo chile are about 12cm long & 2 to 4cm wide with a mild to medium flavour & thin dried-cherry coloured smooth skin. They have excellent flavour; sweet, tangy & spicy, and play well with Ancho chile, being an essential ingredient in Pozole Rojo.
So what can you do with them? Deseed & remove the stem, toast briefly in a dry frying pan & soak in hot water until soft, then drain & blitz in a blender or food processor (adding a little stock if necessary) and you've got the basis of a cracking sauce for enchiladas, chilli or spicy patatas bravas style potatos. Or chuck in a blender with a can of chickpeas, a couple of cloves of garlic & the juice of a lime for a tangy houmous.
Or you can shred & fry with onions & garlic, add a cup of rice & 2 cups of vegetable stock & simmer until the rice is done (stirring in some sweetcorn & green beans at the end of cooking)

Om Nom Nom

Monday 27 October 2008

All We Want To Do Is Eat Your Brains

We're not unreasonable, I mean no ones gonna eat your eyes.
Um. Sorry about that. Moving swiftly on...

Seitan

Today I'm rattling on about Seitan. Also known as Wheat Meat, it's wheat gluten (thus the enemy of the Coeliac), the stuff that gives kneaded dough its elasticity. It has a chewy texture that makes it a good meat substitute. It is pretty flavourless in itself, but takes on other flavours well. There are two ways of making seitan, the easy way and the hard way. Today I'll show the easy way.

First of all you'll be needing some Gluten powder (also known as vital wheat gluten or gluten flour). This can be bought from specialist flour suppliers & some whole food shops (I use The Flour Bin they also have a really nice maltflake flour too). You'll need 2 cups of it for this.

This recipe is for Yellow Bean style seitan, but there are lots of variations you can experiment with.
2 cups gluten powder
1 cup water
1/2 cup yellow bean sauce (I like my seitan with a lot of flavour, so you might want to reduce your quantities here. 2 tbs of yellow bean sauce & 2 tbs soy sauce might be more appropriate for more delicate palates)


Mix the water & seasoning together & pour onto the gluten powder & mix. The whole thing will quickly become rubbery & weird, but fear not! It hasn't all gone horribly wrong, this is how its supposed to look.
Really, it is.


Doesn't look pleasant, does it? Well, it's okay, it'll taste good. Knead the terrifying, rubbery stuff, and don't think about zombies, for about 1 minute (the longer you knead it, the firmer it will be. If you're making a pastrami-style seitan, it's worth kneading it for a good 10 minutes, then it'll be firm, juicy & easy to slice). Cut into two pieces & roll into logs. Wrap each log with muslin/cheesecloth & tie with string (not too tightly, as the seitan will expand a little in cooking). If you don't have any muslin, divide the dough into 4 pieces & flatten into cutlets instead.


Place in a large pan & add
1/4 cup yellow bean sauce
1/4 cup soy sauce
And add enough water to just cover the seitan. Bring to the boil & simmer for 45 minutes to 1 hour, turning occasionally. Remove from heat & leave to cool (you can save the water for cooking rice in if you like) & unwrap.


There you have it. Delicious seitan. It can be cut into thin slices, or chopped into chunks & used in stir fries or anything else that requires chunks of chewy bits. Or you can eat it, slice by slice, as you amble around the house, until there is only a meagre amount left. Then make more.
There are lots of variations for this recipe, just replace the yellow bean sauce & soy with other flavours. I'm a fan of tomato paste, salt, paprika, cayenne, cumin & black pepper for a pastrami-style seitan, or achiote paste & lime juice to make a Puerco Pibil style seitan.
In celebration on tonight's 1st episode of Charlie Brookers Dead Set, here's Jonathan Coulton!

Sunday 26 October 2008

T-Shirt Weather


As anyone who has been to visit us at the House At The Top Of The Hill can testify, we keep our house at the temperature commonly known as Colder Than A Well Diggers Ass. We could claim that we're being green, or that we are just too tight-fisted to heat our house, but the strange truth is; we don't mind the cold.
So while our family, friends & neighbours have had boilers-a-boiling, and the radiators-a-radiating, we're still merrily ambling around in T-shirts/shirts*. But for one thing.
Socks.

Most of the year, socks are something I regard as an unpleasant necessity (like Sheffield Council, or a smear test) that sometimes can't be avoided, so best to grit your teeth & get it over with. Back when I was a cub, it was only the threat of a Scolding From Nan that could make me wear socks, and I merrily scampered barefoot across grass, dirt, mud, sand, concrete, broken glass, drydocks, rotting planks, towpaths & Narrowboats, my leathery soles impervious to twigs, pebbles, rusty nails & cat claws. My mother, long since resigned to the fact that I was Peculiar, made sure I got a tetanus every 7 years & left me to it.

But every year, from November to February, socks & I are grudgingly united. But on the one condition that they must look like I have slain & skinned characters from Sesame Street.

*I'm the T-shirt wearer of the household. Mike favours the kind of shirts recycled out of wallpaper from Stately Homes

Thursday 23 October 2008

Pasilla Chile

Pasilla chile is the dried version of the Chilaca (more about this another time) chile. Pasilla chile is a 15 to 20cm long & 2 to 4 cm wide with dark, wrinkled skin. Mild to medium hot with a flavour best described as swarthy. Think balsamic vinegar, charred dried tomatoes & baked potato skins. Think Johnny Depp in Pirates of the Caribbean. Arr.
So what can you do with it? It can be toasted & crumbled over soup, or added to sauces (it's an essential ingredient in Mole Poblano). Luckily it has an affinity with mushrooms. And cheese. Yes indeedy.
So we may as well dive in, cutlasses clamped in our jaws, and do a recipe that'll do it justice.

Pasilla Mushrooms (good on taco's and also tostadas, fajitas, or spooned over sliced grilled aubergines)

8 cloves garlic, unpeeled
6 Pasilla chiles
1tsp dried oregano
1/4 tsp cumin seed, bruised
Toast the garlic cloves on an ungreased frying pan over a medium heat, turning occasionally, until soft & blackened in spots. Remove the stem & seeds of the Pasillas & press onto the frying pan for a few seconds at a time to toast them while the garlic is roasting. Put to one side. Remove garlic from the pan & peel (all this is for extra flavour, you can leave this part out if you want & just start at the next bit).
Place the chiles in a small bowl & cover with boiling water. Leave to soak for 5 minutes. Strain, reserving 80ml of the soaking water. Put chiles, soaking liquid, garlic, oregano, cumin & a dash of black pepper into a blender or food processor & blend to a smooth puree (adding a little water if it's too thick). Put to one side.

1tbs olive oil
125ml vegetable stock or water
225g sliced mushrooms (anything you like, tame or wild. Shiitake & portobellos are good. So are chestnut mushrooms)
1/2 onion, diced
feta cheese, crumbled (as little or as much as you fancy)
1tbs epazote (if you don't have it, don't worry. Leave it out or use coriander leaves)

Heat oil in a pan over medium heat. Add the chile paste & stir (making sure it doesn't stick or burn. It will try to thwart your efforts. The smoke alarm that never notices burning toast will also try to thwart your efforts). After 5 minutes it will have thickened into a dark, delicious paste, and you will forgive it for being such bloody hard work to make. Add the stock, stir & add the mushrooms & epazote (or coriander) & simmer over a low heat for 10-15 minutes. By then the sauce will be thickly coating the mushrooms. And you should reward yourself with alcohol.
While the sauce has been thickening & you have been putting the batteries back in the smoke alarm (and the beeping it makes has scared the cats out of the house for the rest of the evening), open a packet of tortillas (corn tortillas are best. Home made corn tortillas are the nicest thing in the world. But wheat ones will do fine) & persuade fellow diners to stop playing GTA4*.
Check mushrooms & add salt & pepper if needed, transfer into serving dish & top with crumbled cheese & onion (but you thought I'd forgotten about those) & serve with tortillas.
Om nom nom!

*Yes, I know you're in the middle of a mission, Liberty city will still be there in half an hour

Wednesday 22 October 2008

Leftover Mash

Mashed potatoes. Is there a lovelier, more comforting food in this world? Oh, humble spud, they call you starchy tuber of the solanaceae family, but I call you a hug with calories*

Regular old mash with a stupid amount of black pepper is enough to keep me happy, but if you find it dull, try adding a teaspoon or two of wasabi paste. You won't be disappointed.
But anyway, what to do with leftover mash, eh?

One of my favourite things to do is gnocchi, a potato dumpling. It's a little bit time consuming, something to do when you have an hour free to potter about in the kitchen listening to Tom Waits, but home made gnocchi is much tastier & lighter in texture than shop bought gnocchi.

You'll need:
leftover mash. About 450g. A bit more or a bit less is fine, this isn't an exact science!
1 egg, beaten
plain flour (variable, depending on the texture of the mash)
1/2 tsp of salt
seasonings of your choice (like nutmeg, mixed herbs, fried onions, roasted garlic..)

In a bowl mix together the potatoes, salt & egg. Add your seasonings (I'm a nutmeg girl myself). Add the flour, one tablespoon at a time, mixing as you go, until you have a soft dough (the mixture should not be sticking to your fingers anymore, though most of you will be covered in flour & you'll be able to do a pretty good Marley's Ghost impression)

Turn the dough out onto a well floured surface & cut into roughly walnut-sized pieces. Roll the pieces into rounds (don't worry if they're different sizes) & toss in flour, as they will get sticky when left to their own devices (traditionally gnocchi are shaped by fork & a thumb into a ridged curl shape. It's a fiddly process & I suck at it). If you have more gnocchi than you can eat, it freezes well at this point. Just make sure each dumpling is well floured & put into freezerbags/tupperware/old margarine tubs & stick in the freezer.
Bring a large pan of water to the boil & drop the gnocchi into the water. They will sink to the bottom & lurk in the cloudy water for a few minutes. When ready, they will rise to the surface. Scoop them out.
Now what? Well, they're pretty good with a simple tomato sauce, or tossed in butter & garlic and topped with grated cheese, or drizzled with a lemon dressing, or baked with chunks of pumpkin in a sage & Stilton sauce...

*A hug with butter being a rather more specialised area of the internet that we will not be getting involved in

Sunday 19 October 2008

Pickled Nasturtium Seeds (Poor Mans Capers)


Genuine Capers* (Capparis spinosa) are the pickled or salted bud of a large spiny shrub native to the Mediterranean that grows in hot, well drained dry soil. So no chance of growing it in Yorkshire.

But fear not, for we have an abundance of the next best thing, Nasturtiums! Yes, beloved flower of my old Nan, and unstoppable force at the end of the garden (where I foolishly chucked a 19p packet of Netto seeds several years ago, and have spent every summer ever since battling them for garden supremacy**) Hurrah for nasturtiums! They grow anywhere (they're originally from South America, where all the most delicious things are from), hide a multitude of sins (being essentially a big orange distraction), grow like Billy-O so slugs have no chance of doing their usual destruction, and the flowers & leaves are tasty in salads.

They are also great companion plants for curcubits (courgettes & summer squash) & brassicas (Broccoli & Cauliflower), and will keep growing & producing flowers until the first frost.

But what I'm going on about is the seeds.
Nasturtiums produce lots of seeds, about 3 seeds to every flower (and when planted in full sun they flower a lot!), which should be picked on a dry day when still firm and green (you'll have to rummage around in the leaves to find them).
There are a couple of different methods to pickling the seeds. last year I soaked them in salt water for 3 days (changing the water each day) before packing them into sterilised jars & topping with boiled vinegar. They were nice, but had lost their spicy tang (and whats the point of nasturtiums without their pepperyness?), so this time it's Mrs Beeton's recipe.

Wipe the Nasturtium seeds with a clean cloth (I did give them a quick rinse first) & pack into sterilised glass jars (there are various ways of sterilising, but I tend to swipe some home brewing cleanser & deodoriser from the other half's beer making kit. Works a treat.).
To each pint of vinegar used (I used distilled) add 1/2 oz (about 14g) salt & 6 peppercorns, sling in a pan & bring to the boil. Strain & pour over the capers. Seal & store in a cool dry place, and resist the urge to open for, ooh, 3 months. Though they can be kept longer, up to a year or more if things are good & sterile (I've got some chutney I made in 2006 that's still good***)

*not to be confused with the 3 act caper, which involves heists, plot twists, thrilling rooftop chases and the Woman Who Done Him Wrong
**Though we all know that its the spectacularly fat magpie who lives in the pear tree that is the master of us all
***Made on 6th June 2006, so it was named Apicklypse. Chortle indeed.

Wednesday 15 October 2008

Ancho Chile


Here in the UK chile (or chili, or chilli) peppers come in two varieties. Red & Green. If you're really lucky, maybe Habanero or Birds Eye too. But there are more than 100 different varieties of chile out there, and they don't all blow your head off. Some are mild or sweet. Some taste of chocolate or cherries.

So today I'm blathering on about Ancho chiles (Ancho meaning 'wide' in Spanish, apparently).

Ancho is the dried version of the Poblano chile (which I'll save for another time) it is around 7cm wide at the top & 10cm long with wrinkled skin a dark reddish-brown colour. It's flavour is mild (pretty low down on the Scoville Scale) & a little acid (think tart cherries & earth), and probably my favourite of all chiles.
So what can you do with it? I'm a fan of removing the stem & seeds, shredding it & frying it up with a chopped onion & a couple of cloves of garlic, then adding a cup of long grain rice & 2 cups of vegetable stock, simmering 10-15 minutes & stirring in some chopped green beans & sweetcorn at the end of the cooking time. You can deseed it & toast it in a dry frying pan, leave it to cool & crumble over lentil soup. Or deseed & soak it in hot water for 10 minutes, then discard the soaking water & blitz in a food processor with a couple of cloves of garlic to make a chile paste that could be the start of a pretty good chilli con carne, or enchilada sauce. Or you could add a little honey & a slug of olive oil, toss some sweet potato wedges in it & roast for 35-45 minutes in a hot oven.
Yum!

Tuesday 14 October 2008

Gypsy


I am a Gypsy.

There. I said it.
Probably doesn't seem like a big deal, does it? To write it down where anyone can read it. Bless you, relative anonymity of the internet!
But it is a big deal, at least it is to me. In my 33 years of shambling about in the world it is something I have only dared say to my nearest & most trusted in the last 3 or 4 years. Before that I had only ever told my husband, when he proposed (seemed like the time to tell, really), back when the millennium was all shiny & new.
I am a Gypsy. Specifically I am half Romanichal, half Gadje, meaning non-Gypsy. Poshrat, meaning half-blood. I was raised by my non-Gypsy mother, and taught to keep my ethnicity a secret. Back then schools still refused to teach Gypsy children, Gypsies were beaten up, victimised, persecuted & driven out of towns & villages.
So it was something to keep secret. And it stayed a secret. Frankly its a habit I find hard to break. Every time I speak about it, when I hear a neighbour or a co-worker blame local thefts or vandalism on 'gyppos', when the news fails to report the persecution of the Italian Roma, when someone I've known for many years calls Gypsies 'less than human'*, where I would have kept my mouth shut, now I'm speaking out. And every damn time I expect the earth to swallow me up (stupid irrational brain)
No doubt I'll be returning to this subject before long, striving to right wrongs in my own lumbering, awkward way. In the meantime, Chillies!

*These are just a few of the choicest examples from recent months. I wish I could say I made them up for illustrative purposes, but I didn't.

Saturday 11 October 2008

Getting The Hell Out Of Dodge


After 7 years of being perched at the top of The Steepest Street, after much discussion, dithering, procrastination and the saga of the wall that plaster would not stick to, a descision was made. Time for Operation Get The Hell Out Of Dodge.
Then the economy took a nose dive.
Oh well.
Still, operation Get The hell Out Of Dodge (Eventually) continues. It's been fun living in a city, with 4 different cinemas showing the same mediocre films, and 24 hour access to jaffa cakes. But there's also all the damn people. See, as nice as it is to have all these bars, clubs, theatres, restaurants, cinemas, sports centres and what not, we're not actually using them.
So the plan is vague. Less people. More land. And chickens. And possibly somewhere to make cider. A lot of cider. And keep the chickens and the ciders as far apart as possible. I've never seen a drunk chicken, but I'm betting its not a pleasant sight.